SLIDER


JennifHsieh is a space for my rambling thoughts and snaps of my everyday style. I'm based in Astoria, Queens and I share a home with my two derpy cats and my equally derpy fiancé.
Recipes
Showing posts with label Recipes. Show all posts

April 11, 2015

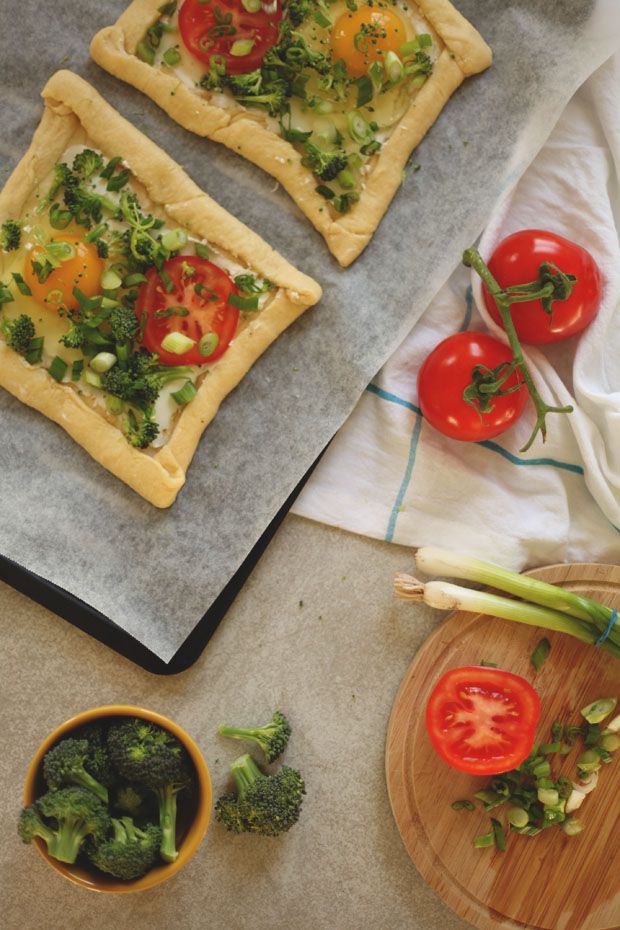
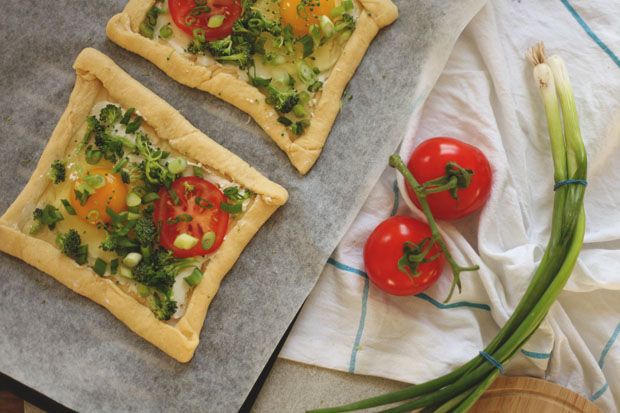
Recipe | Cream Cheese + Egg Croissant Squares
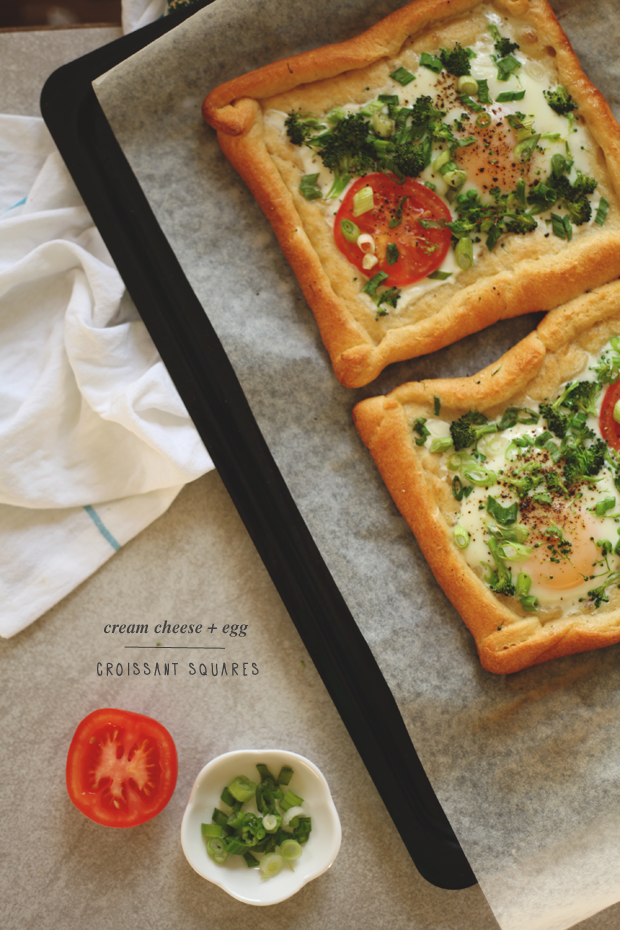

Yet another recipe that indulges my passionate love for croissants. This time, instead of going the sweet route, I decided to try a more savory breakfast recipe that didn't use the classic croissant shape. Jeremy was a huge fan of these and, let's be honest, the presentation all in itself is delicious enough to look at.

Cream Cheese + Egg Croissant Squares
Servings: 2

Ingredients
1 Tube Pillsbury™ refrigerated crescent rolls
1 Fresh Vine Tomato
2 Large Eggs
Handful of Chopped Broccoli
1/2 Stick of Cream Cheese
Scallions
Salt and Pepper
Directions

Preheat the oven to 400°F. In the meantime, grab a tray and cover it with a sheet of parchment paper. 

Open the package of crescent rolls onto the parchment paper and divide it half into two large squares. There's a few perforations in the dough so just patch those up by squeezing the dough back together with your fingers. 

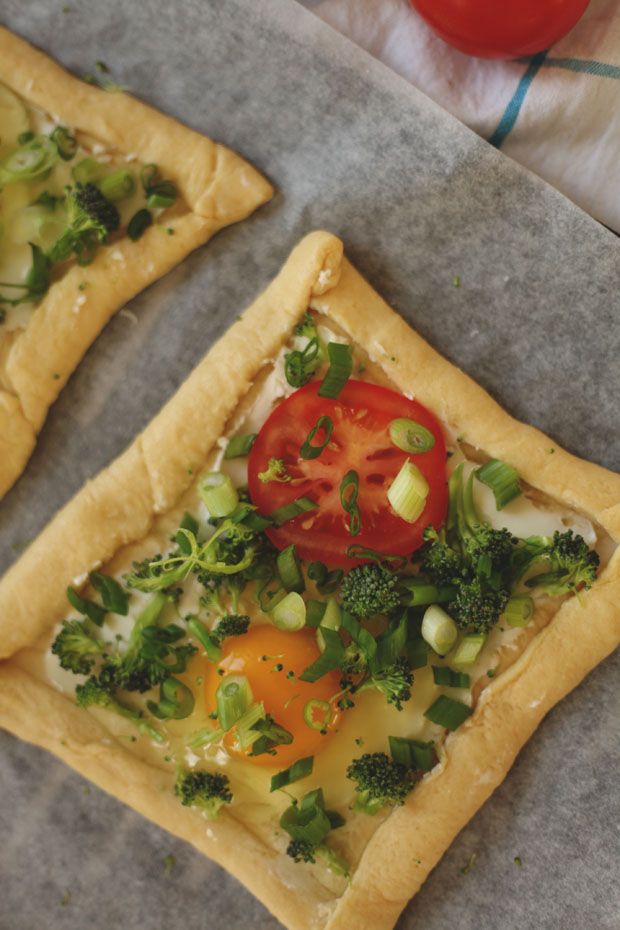
Next, fold over each of the edges about 1/2 an inch to create a "crust" to keep all of the ingredients together while everything is baking. Now, this is where you can go a little crazy with the ingredients. This time, I decided to spread a thin layer of cream cheese as a base. 

On top of the cream cheese, I cracked a large egg on each of the squares, added a tomato slice and some broccoli, and topped with a generous drizzle of sliced scallions, salt, and pepper. Depending on your taste, feel free to add some bacon slices. 

Bake in the oven for 10 minutes (or until the crust is golden brown to your liking). I left it in for 15 minutes so the eggs were cooked a bit more since I'm not the biggest fan of runny eggs. 

Happy nomming!
1 comment

March 24, 2015

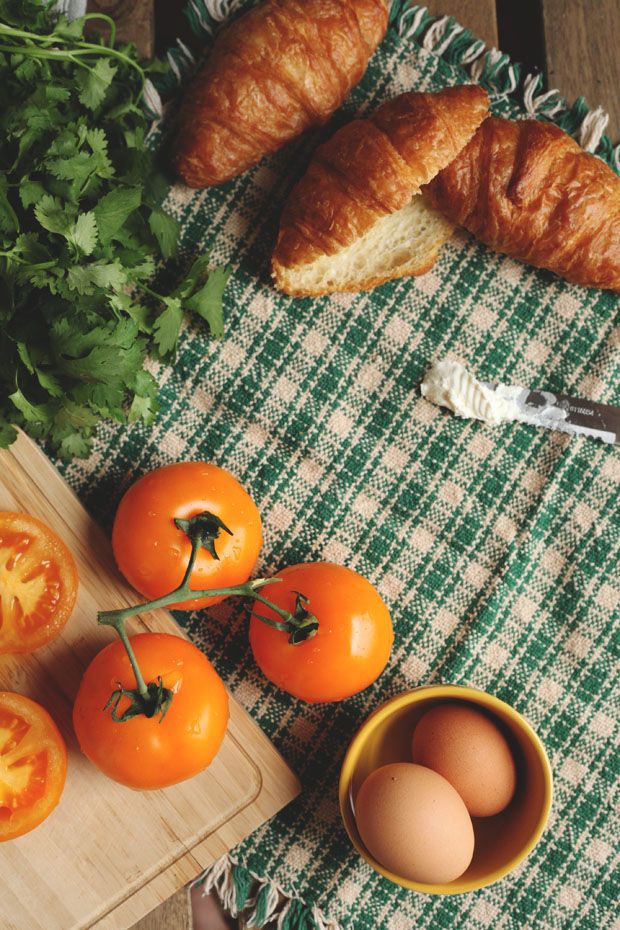
Breakfast Recipe | Open-Faced Croissant Sandwich


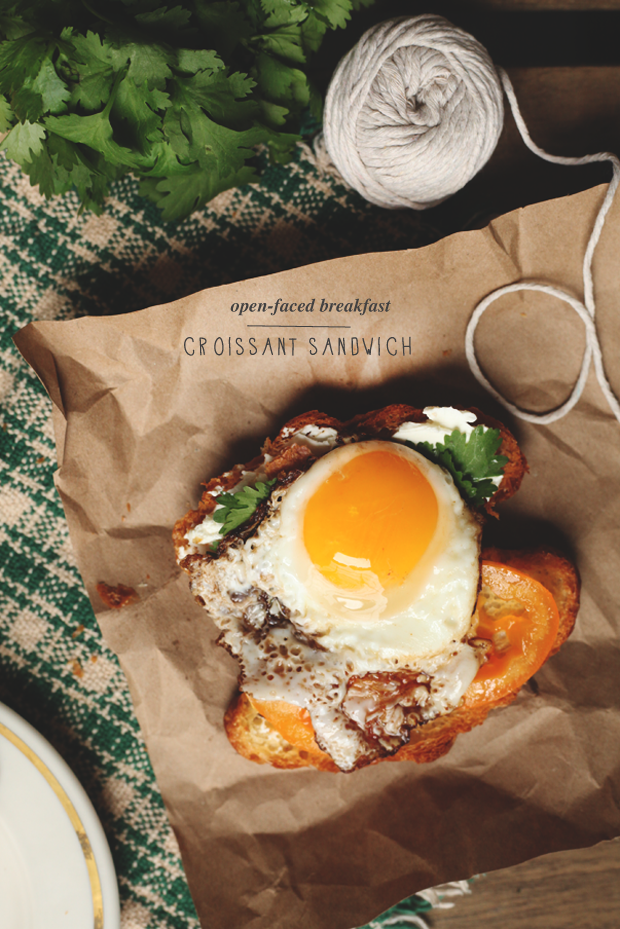
What did I tell you about my love for croissants? I wasn't lying about my obsession; it's an obsession that I'm 100% okay with and one that I never want to leave my side. This time, instead of pleasing my sweet tooth, I decided to go for a more savory dish and indulging Jeremy and I with some mouth-watering breakfast sandwiches.

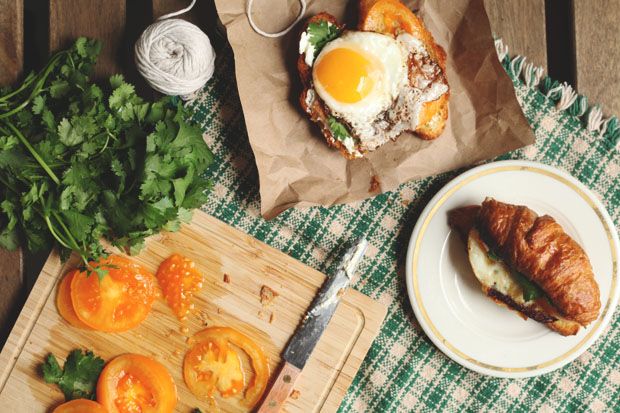
Open-faced Breakfast Croissant Sandwich
Servings: 2

Ingredients
2 Small Croissants
2 Large (Brown) Eggs
Cream Cheese
Fresh Cilantro
1 Ripe Tomato
Butter
Salt + Pepper


Directions

Super easy.

Preheat the oven to 350°F. While the oven is doing its business, melt a small dab of butter on your small sized skillet over low heat. Once the butter is fully melted, crack an egg and fry it to your liking. Jeremy always prefers it on the runny side but I'm a fan of my eggs over hard.

While your egg is slowly cooking and becoming a glob of deliciousness, pop your croissants (cut in half) into the oven face down. They'll crisp up fast, so don't leave them in longer than 2-3 minutes. Once ready, take them out and spread a thin layer of cream cheese on one side. Sprinkle some fresh cilantro on the cream cheese, add another layer of tomato slices, and then gently slide your fried egg onto your sandwich from the skillet. If you're adventurous, drizzle some of the leftover butter in the skillet onto your sandwich for the perfect finishing touch!


Happy Nomming!
3 comments

March 20, 2015

Recipe | Blueberry Croissant Puff


I love croissants. If I'm ordering a breakfast sandwich it has to be on a croissant. If you asked me who would win in a pastry boxing match, croissants would beat the shit out of muffins every single time. Don't even get me started on those heavenly almond croissants. Like, let's take the most perfect pastry and add more deliciousness to it. Swap the almond out with some chocolate? Kill me softly and slowly.

So when I came across this recipe from Christy, who blogs over at The Girl Who Ate Everything, I knew I had to indulge myself. Jeremy wasn't too mad about waking up to eat this bad boy either. Click the link down below for the whole recipe!

Blueberry Croissant Puff
6 servings - full recipe here

Ingredients
1 Cup Fresh/Frozen Blueberries
5 Small Croissants (3 Large Croissants)
2/3 Cup Sugar
1 8 oz. Package of Cream Cheese
1 Cup Milk
1 Teaspoon Vanilla
2 Eggs
Optional: Powdered Sugar

Happy Nomming! 

3 comments

March 4, 2015

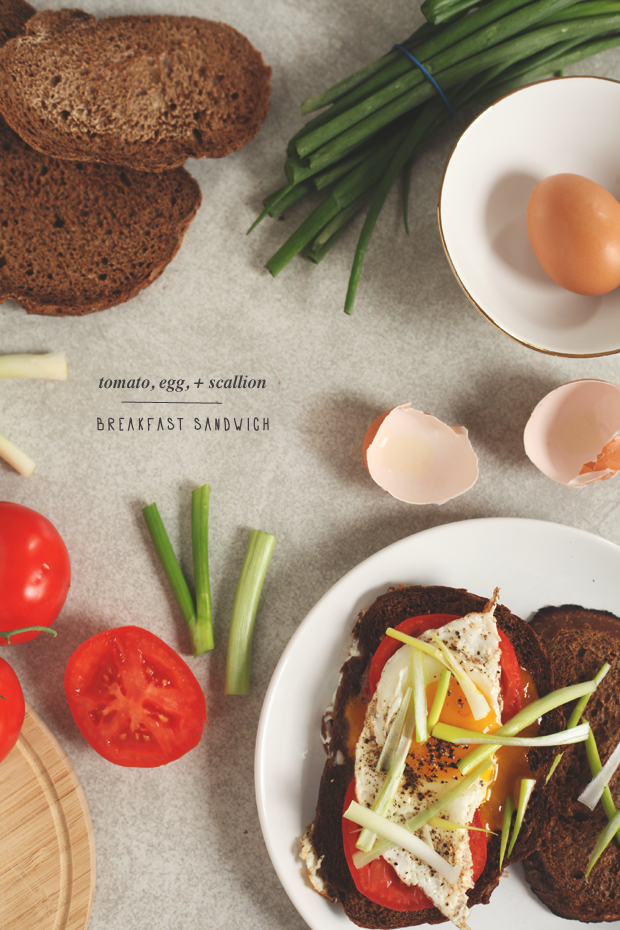
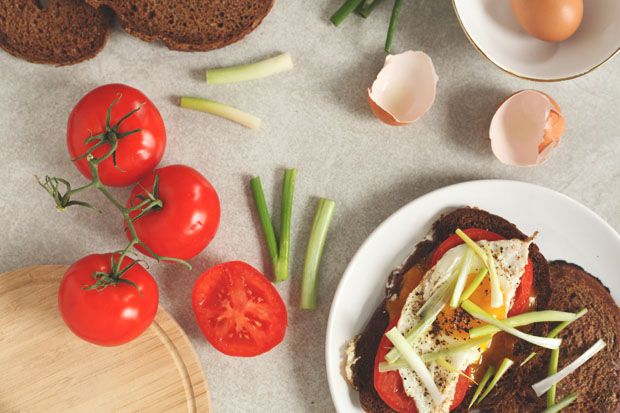
Recipe | Tomato, Egg, + Scallion Breakfast Sandwich


I can't say that breakfast is my favorite meal of the day (there are too many to choose between, it's just not fair), but I can safely say that breakfast is my favorite meal to photograph. I'm always in a productive and generally refreshed mood when I first wake up; also, the natural light that streams in through my living room windows is enough to inspire me by itself. Plus, the recipes almost always involve eggs and, you guys, my love for eggs is too much to handle. So enjoy yet another breakfast recipe. #SorryNotSorry

Tomato, Egg + Scallion Breakfast Sandwich (1 serving)

Ingredients
1 Vine Tomato
1 Scallion
1 Large Brown Egg
2 Slices of Pumpernickel Bread
Salt + Pepper

Directions
First, slice up both your tomatoes and your scallions into thin slices and set them aside. This is when Jeremy usually peers over my shoulder (if he's even awake) and tries to steal some veggies before I've even started cooking them.

Next, melt a thin slice of butter over low heat and place a slice of bread on top as it sizzles. As the bread is warming up, start layering all of your ingredients while cracking open an egg in between them on top of the bread slice. Sprinkle some salt and pepper.

If you prefer your eggs on the runny side, go ahead and serve it up after about five (4) minutes. Otherwise, give it the full ten (10) minutes until the yolk hardens a bit.

Now, take your second slice of bread and spread a thin layer of butter on one side. Place the slice on your "sandwich-in-progress" with the butter side facing up. Take your flipping skills and your spatula nd flip the sandwich over so the second slice of bread has a chance to get incredibly delicious as well.

Once ready, cut in half and serve warm.


Happy nomming! 
9 comments

February 24, 2015

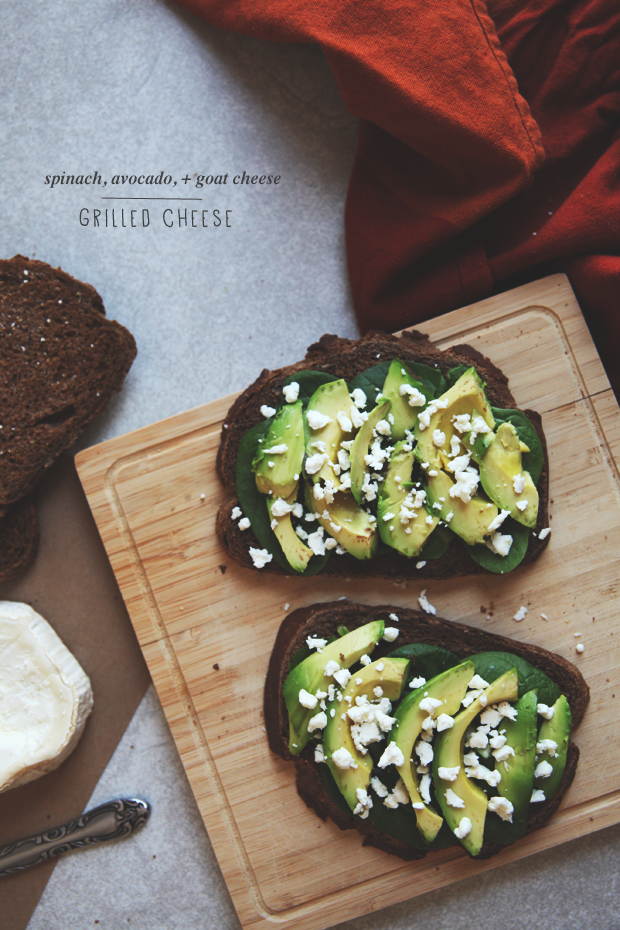
Recipe | Spinach, Avocado, + Goat Cheese Grilled Cheese


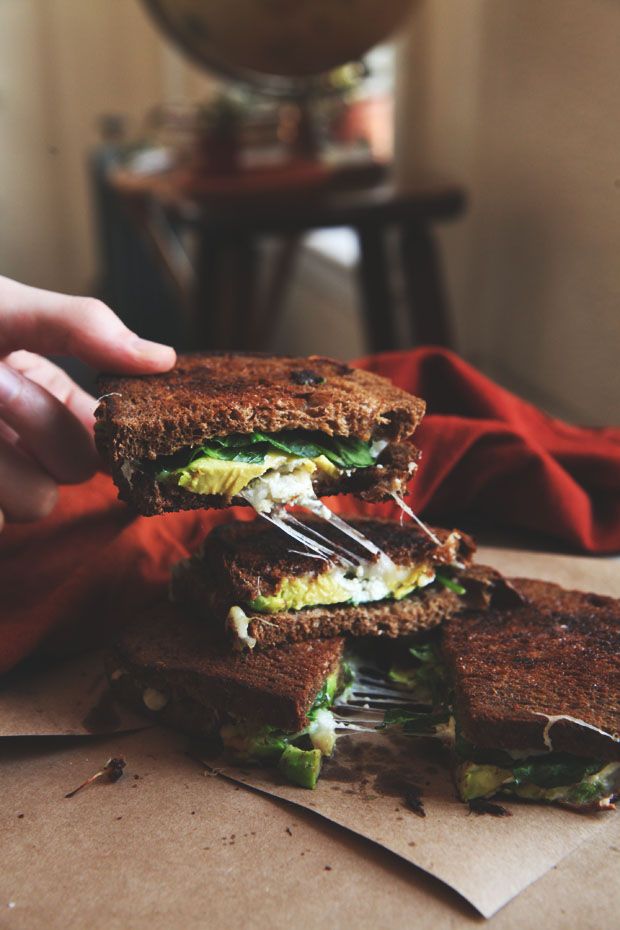
Grilled cheese sandwiches are high on the list of dishes that are "fun to make" and the list of dishes that are "easy to make"; that alone puts them super high on my list of dishes that should "get in my belly ASAP." I've been obsessed with buying avocados lately (it must have been that Super Bowl commercial for Mexican avocados) so I figured I would try out a creamier grilled cheese recipe by combining it with some goat cheese. Then I got a little carried away with cheese in general and now, I present to you, my delicious masterpiece:

Goat Cheese + Avocado Grilled Cheese
2 Servings

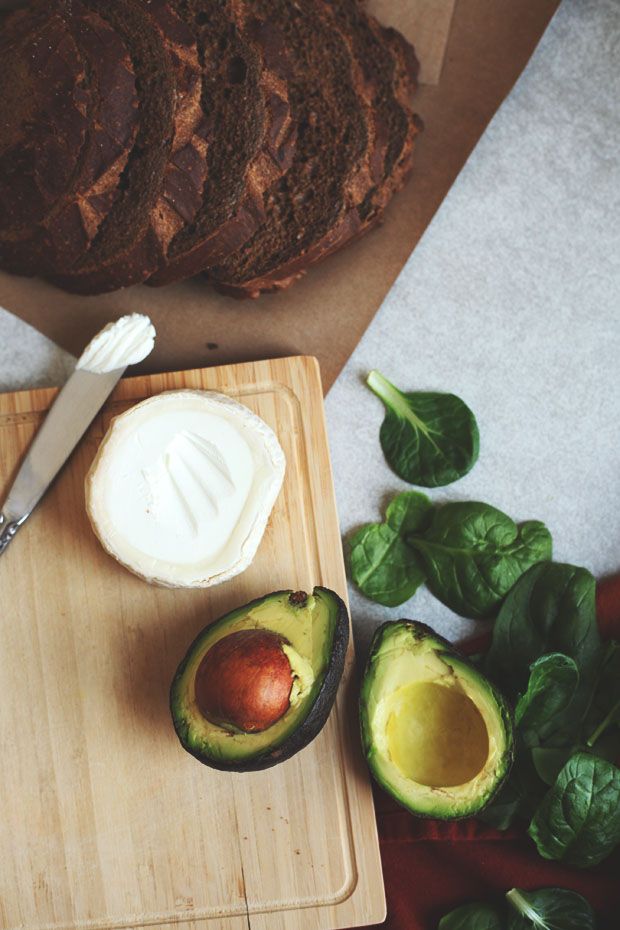
Ingredients

4 Slices of Pumpernickel Bread
1 Small Avocado, sliced
Spinach
Goat Cheese
Feta Cheese (optional)
Shredded Mozzarella
Butter


Directions

Grab two pieces of fresh pumpernickel bread (if you live in the Astoria area, I highly recommend going to Parisi Brothers Bakery on 31st and Broadway) and get ready for a sandwich of a lifetime. On one slice, layer your (1) spinach, (2) half of the sliced avocado, and (3) generous amounts of goat cheese.

On the second slice, spread a thin (or thick, as my unhealthy self likes it) layer of butter on one side and set aside.

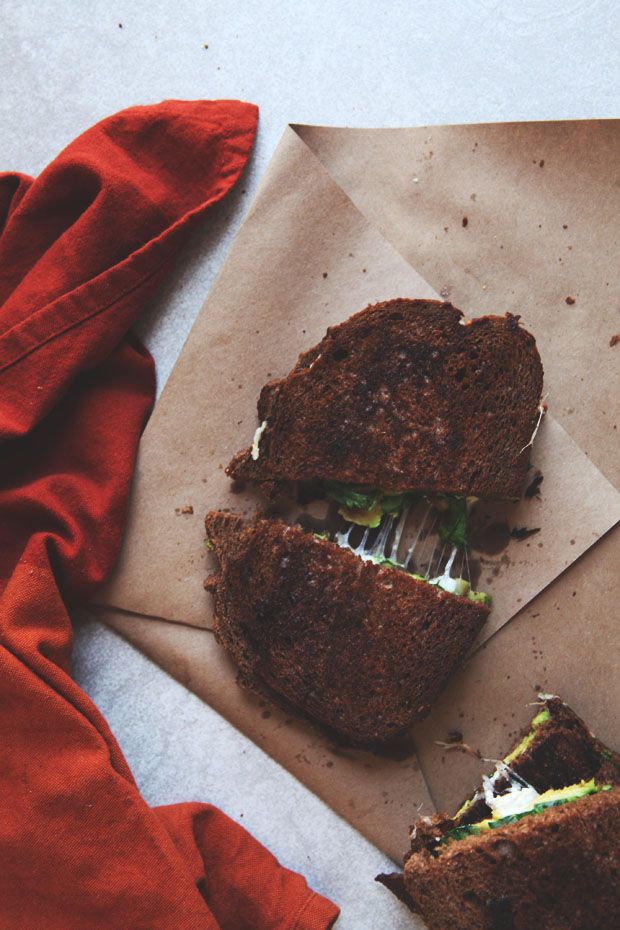
Take a large skillet and set it over a medium flame; drop in a small chunk of butter until it's bubbling and then throw slice numero one in all that deliciousness. While it's slowly melting the goat cheese, add on even more cheese if you'd like (I went with some feta cheese and some mozzarella cheese for the gooeyness). Finally, take your second slice and smack it on top of your sandwich (butter side facing up) and gently smush it down so it really gets all up in that cheese's business.

After a few minutes, flip the whole sandwich over until both sides are brown to your liking and your stomach just can't stand waiting anymore.

Now repeat for your second sandwich that you should probably just eat yourself instead of sharing with others.


Enjoy nomming! 
6 comments

February 9, 2015

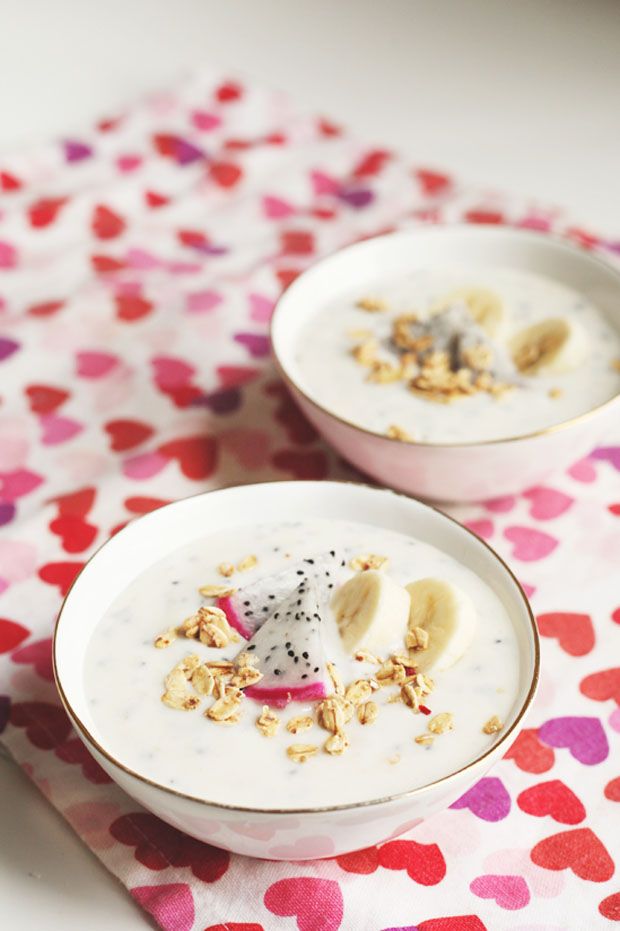
Recipe | Dragon Fruit Smoothie Bowl


I had a photo shoot the other week for one of my brands at work and it involved sourcing dragon fruit as part of a recipe. Now, let me tell you, getting dragon fruit around New York City? Not the easiest task in the world. Usually they can be found in the street fruit carts in downtown Chinatown; but, lucky for us, there was a snowstorm that day so, needless to say, the fruit carts were no where to be seen. I ended up having to take a taxi all the way to Brooklyn Chinatown to pick some up myself, at which point I picked up every kind I could get my hands on to avoid having to make a second trip.

This turned out to work out in my favor since I got to take the extra dragon fruit home to experiment with. There aren't too many things you can do with a dragon fruit out there in the internets, but I figured I would try to find a way to use it where you weren't just straight up eating it as it comes. Enjoy!

Dragon Fruit Smoothie Bowl
Servings: 2

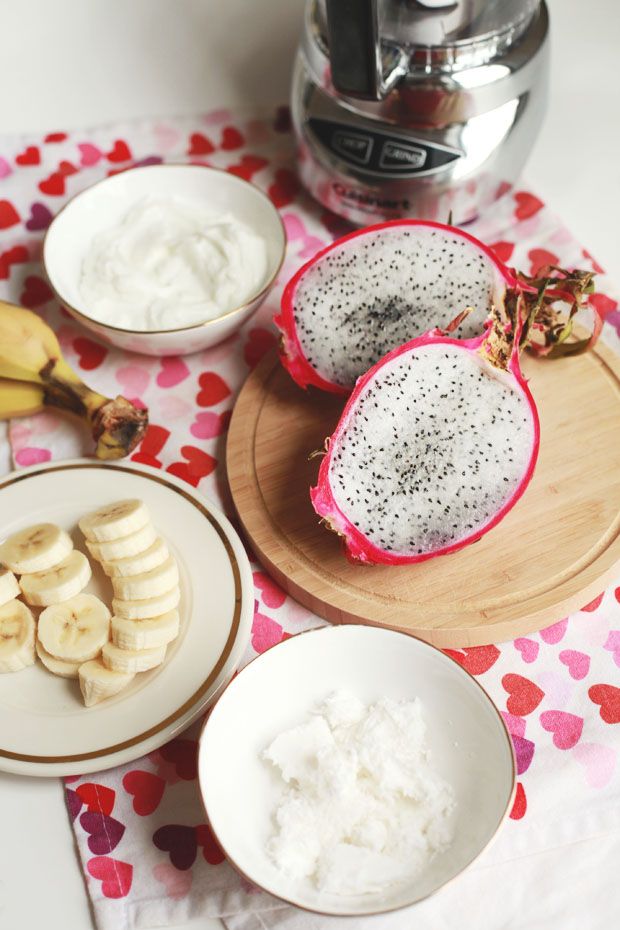
Ingredients
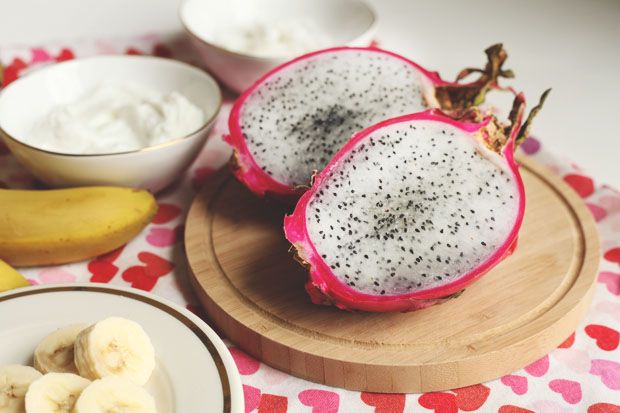
1 White-flesh Dragon Fruit
1 Cup Frozen Coconut
1 Large Banana (sliced)
1 Cup Vanilla Greek Yogurt
2 Tbsp Honey
Granola (optional topping)

Directions

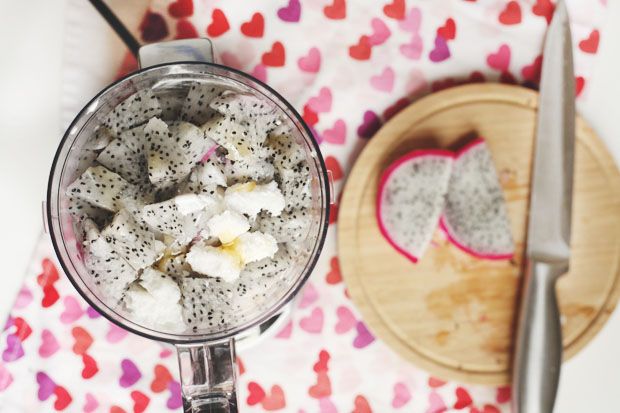
Slice up the dragon fruit into small chunks so it'll be quicker to mix them in the food processor. I usually slice them into squares when they're still in the skin, and then I slice around the circumference of the shell and watch them all fall out. Easy peasy.

Drop those into the food processor along with the rest of the ingredients. It's super important to use frozen coconut instead of regular coconut because it acts as "ice" so your smoothie is chilled upon serving. Blend until it's a thick, creamy consistency and serve with extra fruit on top!

If I'm eating it for breakfast, I'll usually sprinkle some plain granola on top to give it a bit more texture.


Happy Nomming! 
4 comments

January 22, 2015

Recipe | Bacon, Avocado, and Egg Breakfast Sandwich


Back in college, the single cure for an extreme hangover was a greasy breakfast sandwich. Nowadays my extreme hangover mornings aren't as common but I still have an intense love for breakfast sandwiches. But now as I age, grease catches up to you so I figured it was time to make my own breakfast sandwiches from scratch for a healthier (and still delicious) alternative.

Bacon, Avocado, and Egg Breakfast Sandwich
1 serving

Ingredients
1 Frozen Bagel
1 Large Egg
1 Large Avocado
2 strips of Bacon
Sharp Cheddar Cheese
1 tbsp Butter
1 tsp Lemon Juice
Salt + Black Pepper


Directions

First things first: the bagels. Place your frozen bagels (I have many, thanks to Jeremy's Jewish family) in the cold oven, and then preheat to 350. Leave 'em in for approximately 12 minutes, or until it's to your liking. Mine were pre-sliced but you can always just slice them after if they come whole - Jeremy likes to freeze out bagels so they'll stay for much longer.

While all that bagel drama is going down in the oven, start frying up that bacon in a large skillet so you have room to spread them around so they aren't overlapping. There's no need to use oil since the bacon will produce enough natural oil by itself to fry up the strips. Noms. Once they're crisp to your liking, set them aside and leave a thin layer of bacon grease in the skillet.

Next, let's tackle the avocado. Cut the bad boy in half (around the center pit) and twist to open up the avocado. Slice the meat into squares and scoop out the squares into a bowl. Sprinkle some pepper and lemon juice into the bowl and then mash the avocado until it's smooth but still a little bit chunky.


Now it's time to...cut the cheese. But not like that. Actually, cut the cheddar cheese (or any type of cheese you're lovin') into thin slices. Set them aside with all your other prepared goodies.

Now let's go back to that bacon grease-filled skillet. I always save the eggs for last since they cool down the quickest and they are best eaten straight away. Break your large egg into the skillet and let it fry as it soaks in the bacon flavor and flip over once. If you'd rather avoid using the bacon fat, swap out for a little bit of butter. I prefer my yolk to be firm and my egg whites to be crisp, but if you like it to be runny you can just fry it until you're satisfied.

Take out your bagels from the oven now; handle with care since they'll be super hot and crisp. Load up with your bacon, fried egg, avocado, and cheddar cheese until your mouth is watering like crazy.


Happy Nomming! 
5 comments

January 13, 2015

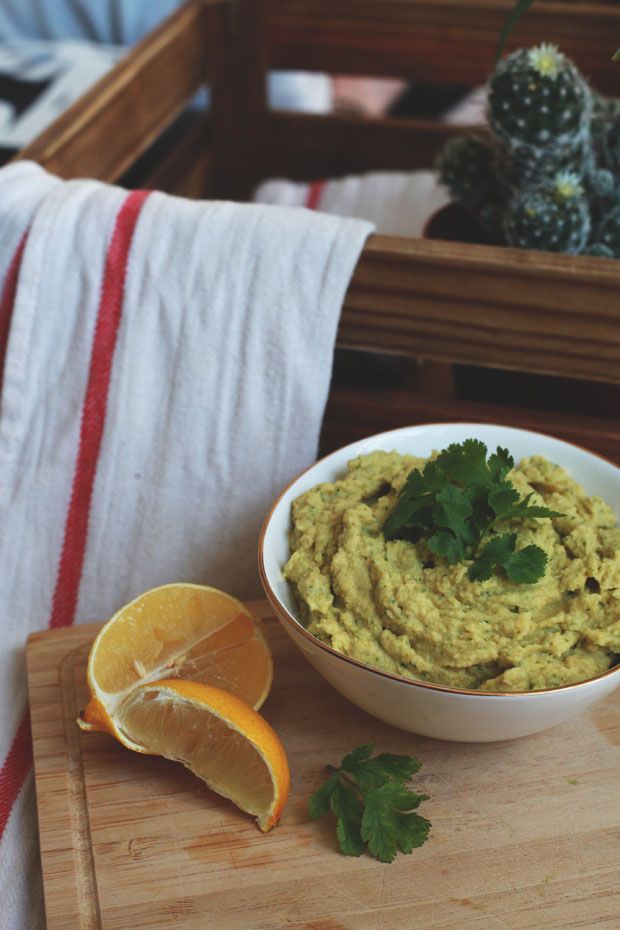
Recipe | Cilantro + Avocado Hummus

In the past five years my love for hummus must have been the fastest growing love of any type of edible substance in the history of Jen. A few months ago, one of my friends mentioned to me that he makes his own hummus instead of buying pre-made hummus in the stores since it's ridiculously cheaper and it's easier to experiment with different flavors. It was always in the back of my mind, but recently Jeremy's dad and stepmom gifted us with a food processor as a belated housewarming gift and I'm pretty sure we're already best friends. It also gave us the perfect opportunity to finally make our own hummus and I knew I had to start with some Cilantro and Avocado Hummus. It's like if guacamole and hummus got together, went on a few dates, had a whirlwind of a romance, and made a baby out of wedlock. So good.

Cilantro + Avocado Hummus
12 Servings, 10 minutes

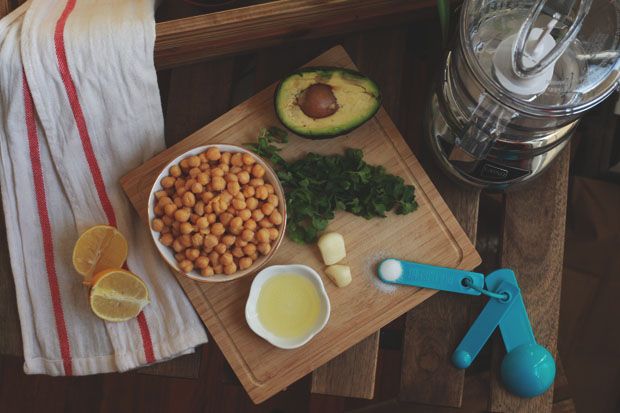
Ingredients
1 can Chickpeas
1 large Avocado
1 clove Garlic
Handful of fresh Cilantro
2 tbsp Water
2 tbsp Lemon Juice
1 tbsp Olive Oil
1/4 tsp Salt

Directions
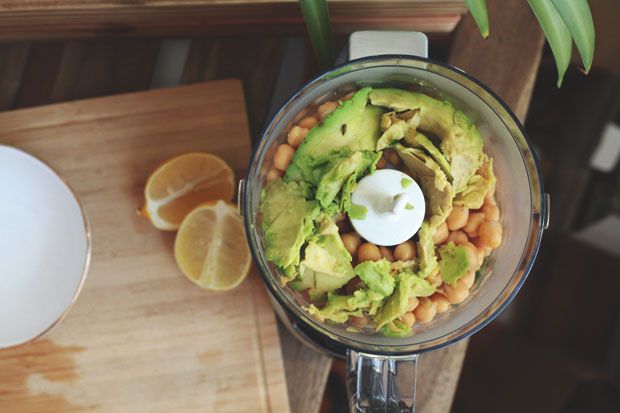
Combine everything in a food processor and blend well until it's a creamy and consistent texture. The hummus will be creamy and thick - if you prefer to have larger chunks of avocado and chickpeas, feel free to grind the ingredients for a shorter amount of time.

Top everything with an extra drizzle or two of olive oil and some fresh sprigs of cilantro to do the trick. Serve with dipping foods (carrots, celery, pita bread, tortilla chips, etc.) or try using it as an ingredient to larger recipes in place of guacamole.

Happy Nomming! 
3 comments

January 10, 2015

Recipe | Egg White Omelet with Goat Cheese + Avocado


One of the best parts of lazy weekends is having the time to make breakfast. I definitely don't pay enough to one of the most important meals of the day (that's not saying much since every meal is important to me, including the in-between meals), but the weekends is when I really put it in the spotlight. I tried this super quick and easy omelet recipe this morning and my taste buds were so pumped that they were high fiving each other. It has a pretty creamy texture and an extra kick to the flavor thanks to the cilantro.

Egg White Omelet with Goat Cheese + Avocado
Serves 1

Ingredients
2 Egg Whites
2 tsp Heavy Cream
Olive Oil
1/2 Large Avacado
Salt + Pepper
Crumbled Goat Cheese
Fresh Cilantro
Optional: Chili Powder


Directions

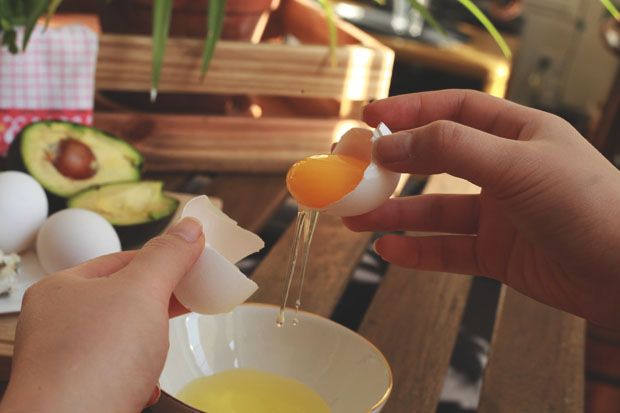
Whisk together two egg whites and two (2) tsp of heavy cream. To separate egg whites from the yolk, simply break the egg in half and gently pass the yolk between the two shell halves until all of the egg whites drip into the bowl.


Add the egg mixture to a small pan with a light coating of olive oil and cook it over medium to low heat. Add some salt and pepper to the egg while cooking and flip the egg over once it's at your desired level of done. Once both sides are done, slide it onto a plate and add the sliced avocado and crumbled goat cheese to one side of the omelet. Fold the omelet in half and top generously with fresh cilantro and a dash of chili pepper for an extra kick.

Happy Nomming! 
3 comments

January 4, 2015

Recipe | Rosemary + Olive Oil Fries


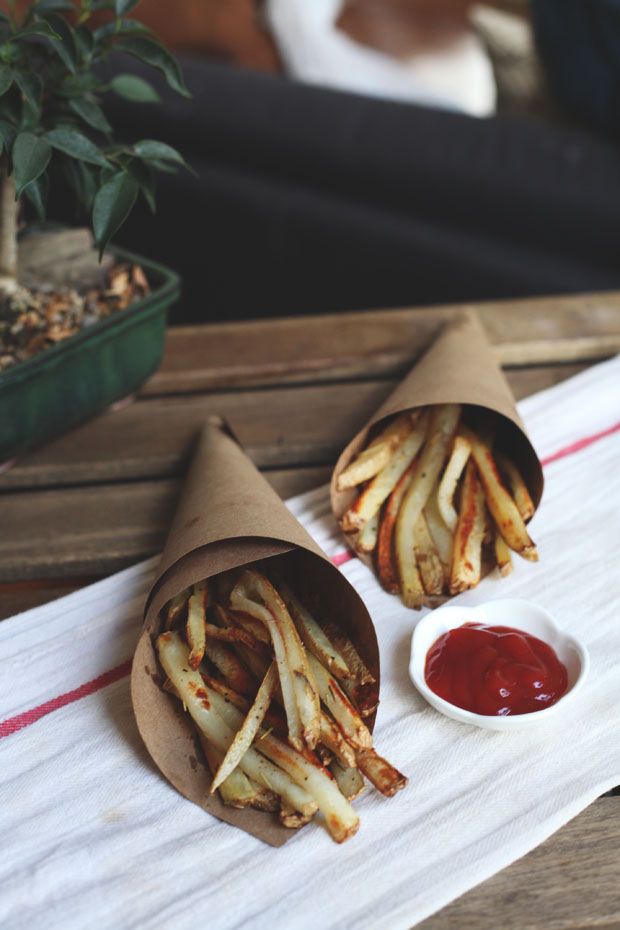
One thing that I want to strive to do more of this year is to go outside my comfort zone with my cooking. Documenting it on this lil' blog will help keep me motivated throughout the year instead of resorting back to my usual ramen dinners and pasta lunches. One of my favorite lunches lately was these Rosemary + Olive Oil fries. It's such a cheap and delicious meal to make and you can always experiment with the flavors just by changing out different spices and herbs. Next time I'm aiming for garlic and parmesan fries. I'm drooling thinking about it already.

Rosemary + Olive Oil Fries
Serves 2-3

Ingredients

2 Russet Potatoes
2 Teaspoons Rosemary
3 Tablespoons Olive Oil
Black Pepper
Sea Salt

Directions

First, of course, let's take care of the good ol' preheating. Preheat your oven to a nice warm 475ºF.

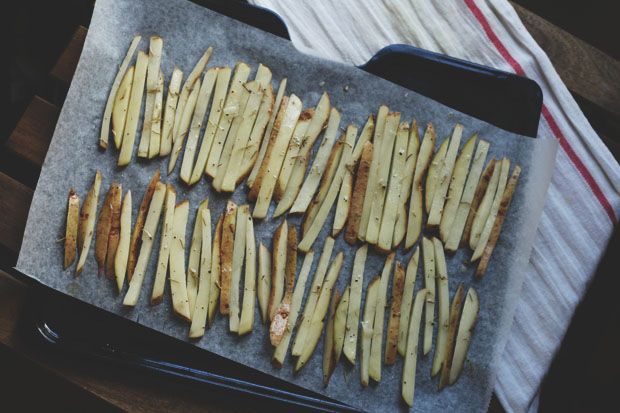
Now for the potatoes. Rinse and scrub down the outside of each potato under warm water before slicing them into long strips. The thinner you slice the fries, the crispier they will end up. Personally, I like my fries to be pretty thick and soft, but Jeremy prefers crispy fries so I ended up making a mix of both (as you can see below).

After the potatoes are sliced up, be sure to soak the potato slices in water for at least thirty (30) minutes in order to remove the excess starch. Once they've properly soaked, lay them out on a tray lined with paper towels in order to soak up all moisture.

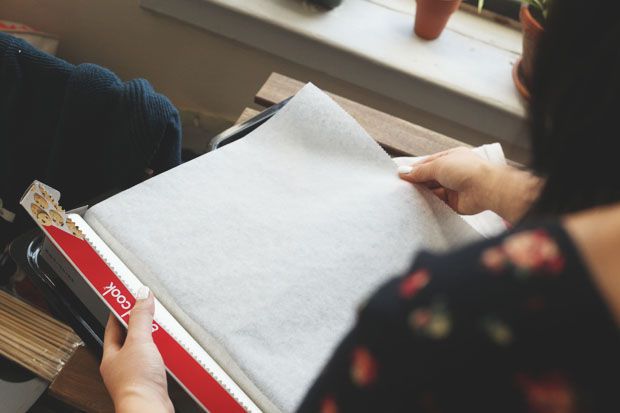
To bake your fries, use parchment paper instead of aluminum foil so the fries will more easily crisp on the outside and stay wonderfully soft on the inside (not to mention they won't stick when they're done). Drizzle two (2) tablespoons of olive oil on the sheet of parchment paper and evenly spread it around to cover the entire area.


Next, put your fries into a dry bowl and gently toss them around with the remaining tablespoon of olive oil, a dash of salt and black pepper, and the rosemary. Here's where you can get creative with the spices and herbs you use as well.

Once you're done, lay your seasoned fries out on the parchment paper in a single layer so none of them are overlapping. Top with any additional seasoning to your liking and bake at 475ºF for approximately 15 minutes. Take the fries out and toss them around so all sides will evenly crisp. Put them back in for about another 20 minutes (the longer you keep them in the oven the crispier they will be).


Happy nomming! 

5 comments

December 30, 2013

Guest Post: Stephen of Feeding My Folks

The amazing Jennifer Hsieh asked me to be a guest blogger this holiday season and I couldn't be more honored. Not only is she a fantastic writer, stylist, and fashion guru, but she's also one of the best people I know. That's right, her coolness transcends this crazy thing we call the internet. If you ever have a chance to meet her in person, take it. Home girl is awesome. So now that I've gushed about Jen (who may or may not be paying me for every compliment), let me introduce myself:

Hi, I'm Stephen from FeedingMyFolks!
For those of you who've read her blog before, Jen has been a fan of my pumpkin squares since she brought them to a work function last year. Since that dessert is great for holiday entertaining, I thought I'd throw her yet another recipe perfect for serving at an ugly sweater shindig, cozy cocktail party, or even just as something to sip during a Christmas movie marathon. Sounds good, right? Welcome to the world of mulled wine.


For those of you who aren't sure what mulled wine is, it's a warm beverage consisting of red wine, spices, and fruit. It's errs on the sweet side, but the sweetness can be increased/decreased based on your particular tastes. Hints of orange, cinnamon, clove, and star anise (which is a bit licorice-y) strike the tongue with every sip. This recipe is great to have on hand when you have surprise guests during the holidays because it takes only minutes to prepare (20, to be exact). If you have the time, let this bad boy sit overnight. The flavors deepen and tastes really good.

If you're still not sold, think of mulled wine as sangria for a cold winter night. People traditionally use port wine, but any red would work splendidly. Have a happy holiday season. :)

**Makes 4 servings** 
3 cups red wine 
1 ½ cup apple cider (or apple juice) 
1/4 cup apple liquor 
1/2 orange (zested and juice) 
5 whole cloves 
3 star anise 
2 cinnamon sticks 
1 nutmeg (crushed) 
5-8 tablespoons honey 

Place all ingredients into a medium pot and bring to a boil. Reduce heat to low, and simmer for 15 minutes. Cool slightly and strain into glasses. Garnish with an orange/apple slice and cinnamon stick. Serve and enjoy!
5 comments
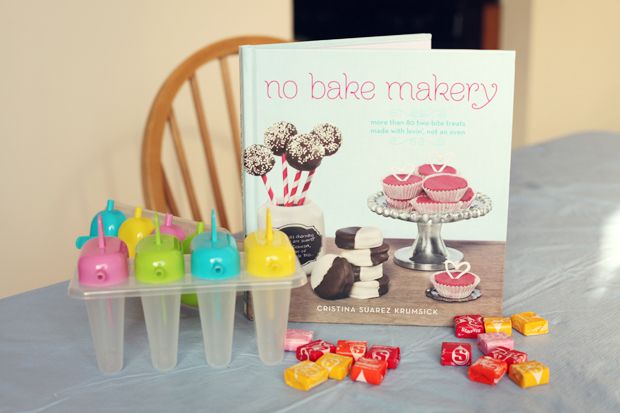
No Bake Makery: Star Bursts Recipe & Giveaway

May 7, 2013

No Bake Makery: Star Bursts Recipe & Giveaway


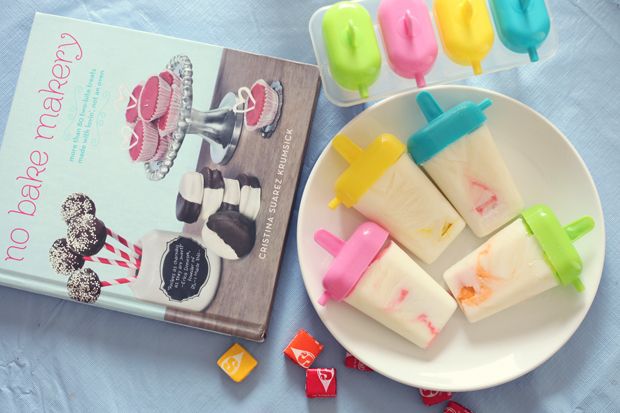
Although I love my New York City apartment, I have to admit that my kitchen can feel a little bit cramped, especially with three people squeezing in and out of it. Being right out of college as well, I don't really have that much experience with taking advantage of all my kitchen has to offer. So when I heard about Cristina Suarez Krumsick's new book (just released today!), No Bake Makery, I couldn't help but try out some of her desserts. None of her recipes require an oven which is perfect for the summer weather! Turning on the oven can heat up any kitchen and, fellow New Yorkers can agree, any extra bit of heat can turn your entire apartment into a steam room. And seriously, how can any of you resist these desserts after taking one look at them? 

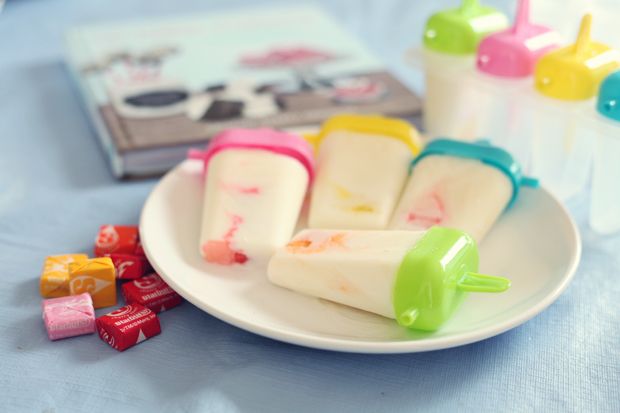
I started off with an easier recipe that required less ingredients: Star Bursts. It's a very tart and yogurty popsicle recipe with a pop of sweetness due to the frozen starbursts. So perfect for those hot summer days! I treated myself to a Star Burst popsicle for breakfast this morning because I couldn't resist waiting any longer to try one. And hey, it has yogurt and orange juice...both of which are breakfast foods. That counts, right?


And guess what the best news is? You guys have a chance to win a copy of your own! Complete your entries in the rafflecopter box down below. In the meantime, be sure to visit Cristina's blog for another chance to win (and for a million more delicious recipes)!

a Rafflecopter giveaway

Only open to the US.
5 comments
Pumpkin Squares Recipe

November 25, 2012

Pumpkin Squares Recipe


So in my Thanksgiving potluck post, I mentioned that I brought in some delicious pumpkin squares to my office as my contribution to the epic feast. My roommate, Rob, is obsessed with everything and all things pumpkin when the fall rolls around and I'm pretty sure it rubs off on me. I can't help but share in his obsession when I open the fridge to find pumpkin beers, pumpkin butter, and pumpkin pie. There's just too much pumpkin to handle! That's why I knew I had to try out my friend's recipe for these Pumpkin Squares. It was love at first sight. If you guys are looking for a deliciously easy treat to make for an upcoming holiday party, I highly recommend these. They're little bits of heaven and they're not overly sweet (so your family will fawn over them without feeling guilty). Let me know if you guys try out the recipe! :)

Recipe via Feeding my Folks
17 comments
Red Pepper Egg-in-a-Hole Recipe

November 13, 2012

Red Pepper Egg-in-a-Hole Recipe


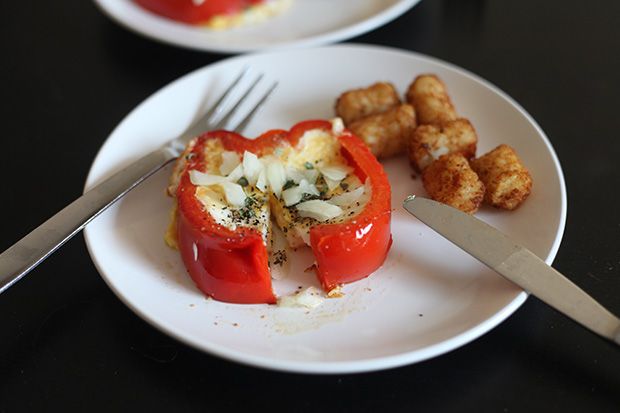
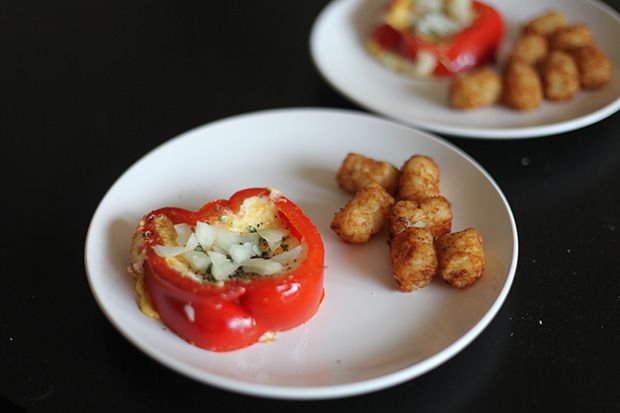
The other day I came across this recipe from SkinnyTaste while I was browsing on Twitter at work. I lack a decent amount of talent in the kitchen and this recipe looked simple and delicious enough to try! On Sunday morning, I treated my roommate Rob and myself to some delicious Red Pepper Egg-in-a-holes.  I never realized how sweet red peppers were and it was delectable with the eggs. It really was as easy as it looks and I added some raw onions to the top for that extra crunch. Yum! Let me know if you try it out too!

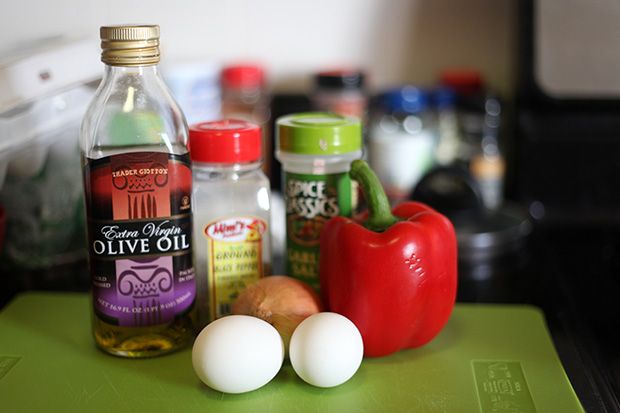
Ingredients (serves 4)
Extra Virgin Olive Oil
1 Bell Pepper cut into 4 1/2" thick rings
4 Large eggs
Salt, Pepper

Heat a drizzle of olive oil into a skillet on medium heat. Add the pepper slices and let them cook for a minute. Next, add the egg into the center of the pepper slice. Personally, I mixed up the egg before cooking them since I don't like them to be too runny. However, you can just crack the egg directly into the pepper slice and let it cook until the egg whites are mostly set. Don't forget to add in your salt and pepper at this point. After 2-3 minutes, carefully flip the pepper slice over and cook for another minute for over easy eggs (and longer for over well eggs). Then you're done! A super quick breakfast for people like me who hate waiting for their food. I added freshly minced onions to mine but next time I think I'll try adding cheese!

12 comments
© JennifHsieh | A Personal Style + Life Blog • Theme by Maira G.